-
The appearance of the product may differ from the illustrations presented in this manual.
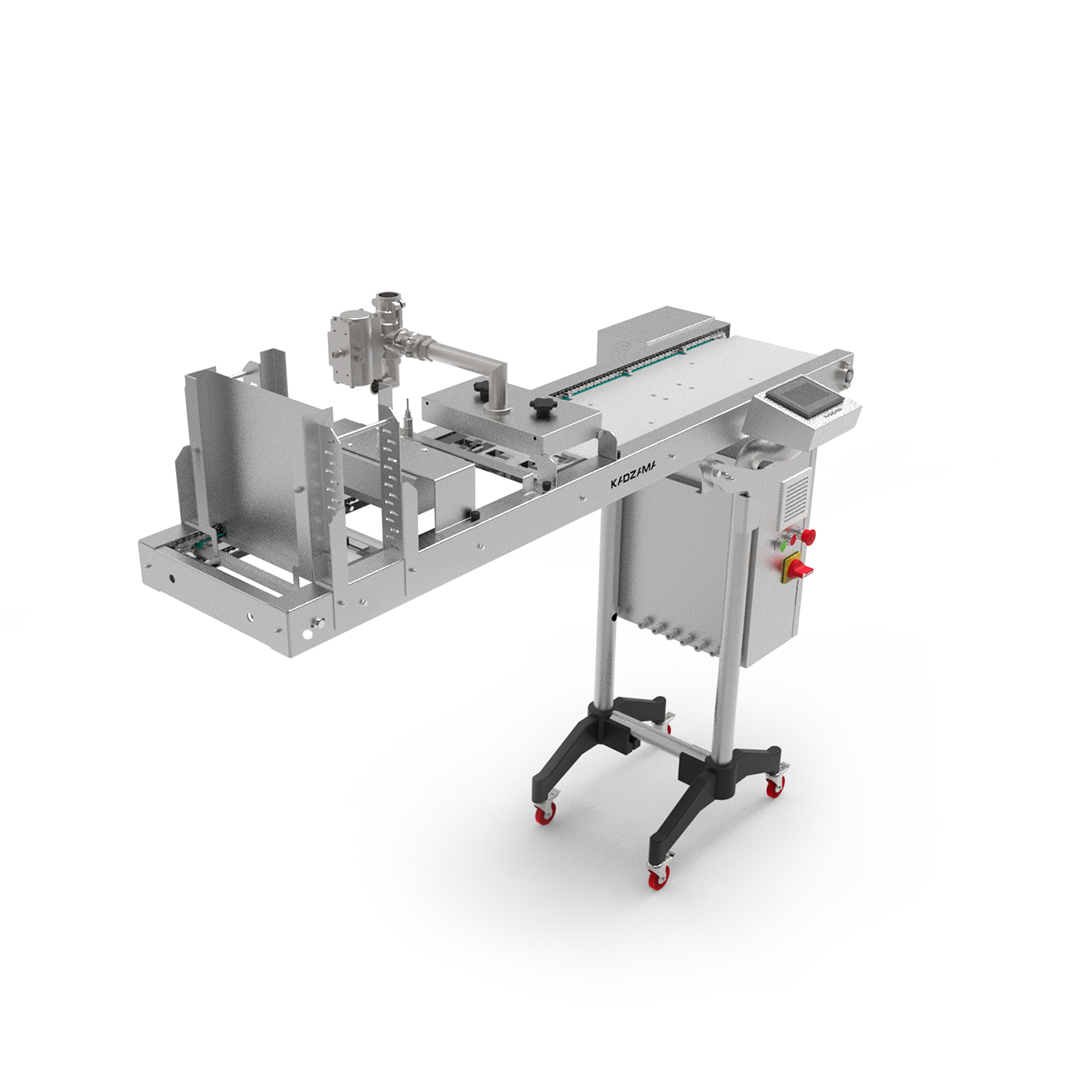
Automatic mold loader
Manual
This manual is designed for study the main technical characteristics, operating principle and rules of technical operation of an automatic mold loader.
Before use carefully read the instructions below!
Improper use of the equipment can be a source of danger. By starting work with the device you confirm that you are fully acquainted with this manual and understood the rules of operation of the device.
KADZAMA Ltd appreciates your purchase and wishes you a pleasant work experience.
-
Purpose of the device
Automatic mold loader is designed to supply and fill molds with product, remove air from it and move it to the cooling zone.
-
Specifications
Power supply, [V] / [Hz] 220 / 50 Power intake (not more than), [kW / h] 0,4 Required air pressure, [bar] 6 Material Stainless steel Heating range, [°C] 20 – 50 Dimensional size (L x W x H), [mm] 1650 х 705 х 1092 Weight (unpackaged / in package), [kg] 75 / 105 -
Configuration
Automatic mold loader — 1 pc.
Manual — 1 pc.
Warranty card — 1 pc.
IMPORTANT: air compressor is not included.
-
Safety measures
4.1. Automatic mold loader is an electric appliance with a certain danger potential. When connecting the device to the electric grid, take all necessary precautions to avoid electric shock.
4.2. Automatic mold loader must be connected to the power supply and operated only by trained personnel.
4.3. It is not allowed to operate automatic mold loader in the absence of electrical grounding («E» wire).
4.4. Automatic mold loader should be used only for its intended purpose.
4.5. Use and store automatic mold loader in a place out of reach of children.
4.6. Do not leave automatic mold loader switched on without supervision for a long time.
4.7. Do not operate automatic mold loader with wet hands.
4.8. Do not allow liquids inside the body of an automatic mold loader.
4.9. Do not use automatic mold loader at ambient temperatures below 10˚C and above 40˚C, and relative humidity above 80%.
4.10. When transporting automatic mold loader at sub zero temperatures, prior to first use it should be kept at room temperature for at least 1 hour.
4.11. Any maintenance should be carried out when automatic mold loader is disconnected from the power supply!
4.12. Repair or disassembly of automatic mold loader may only be provided with the assistance of qualified personnel of KADZAMA Ltd.
-
Constructive elements description
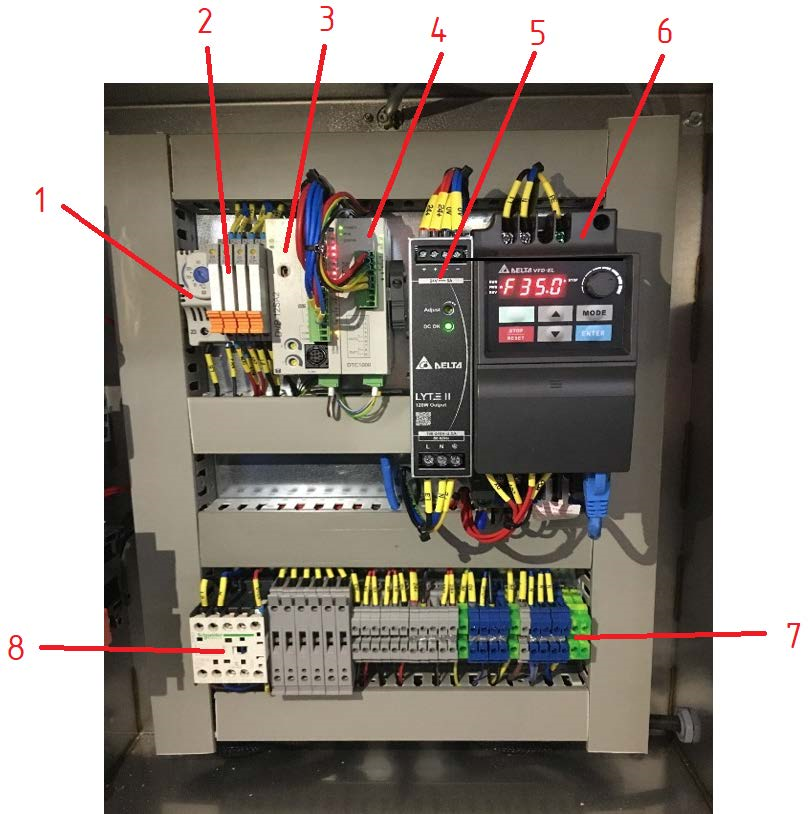
1 — Thermostat
2 — Relay block
3 — PLC
4 — Thermal regulator
5 — Power unit
6 — Frequency converter
7 — Terminal block
8 — Contactor
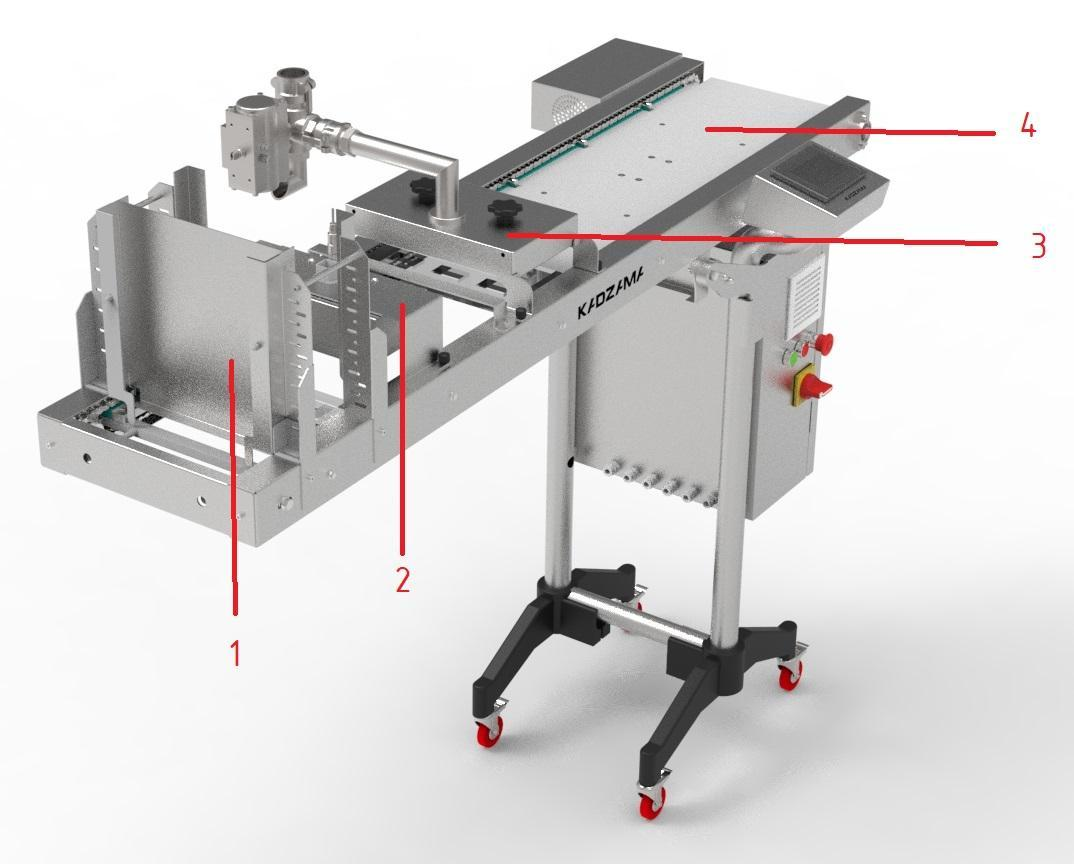
1 — Mold loading bin
2 — Mold heating
3 — Dosing plate
4 — Vibrating table
-
Before start
6.1. Remove the packaging.
6.2. Set an automatic mold loader on a flat hard surface, providing easy access to controls.
6.3. Connect automatic mold loader with automatic tempering machine:
— position the automatic mold loader so that the grooves align with the pins on the ATM:
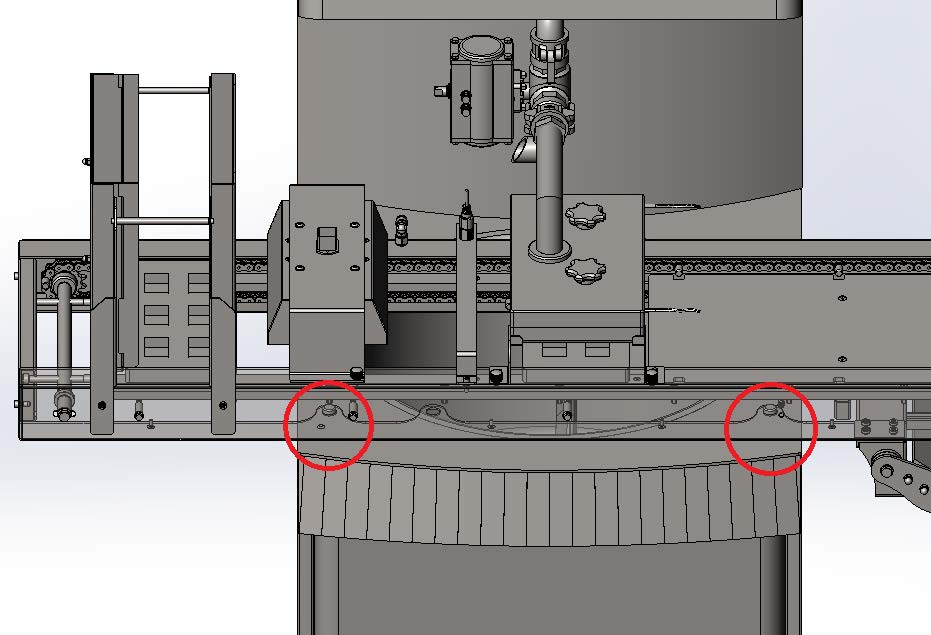
— connect the camlock to the spout of the tempering machine;
— connect the power to the main units:
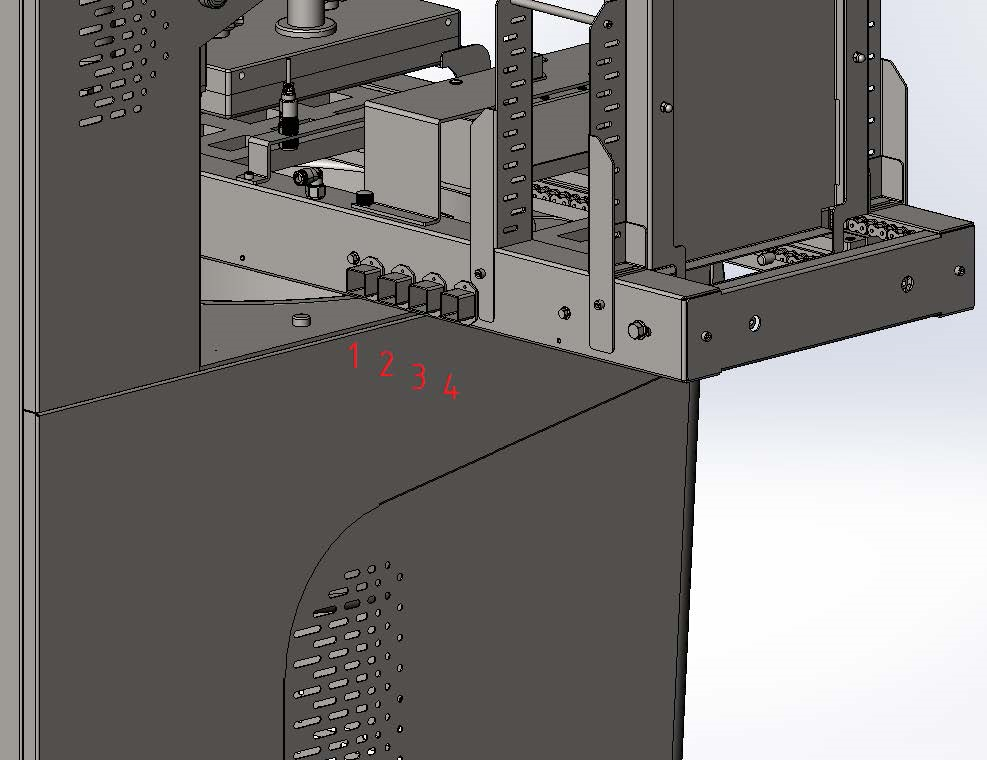
1 — Drive unit
2 — Sensor
3 — Fill
4 — Heating
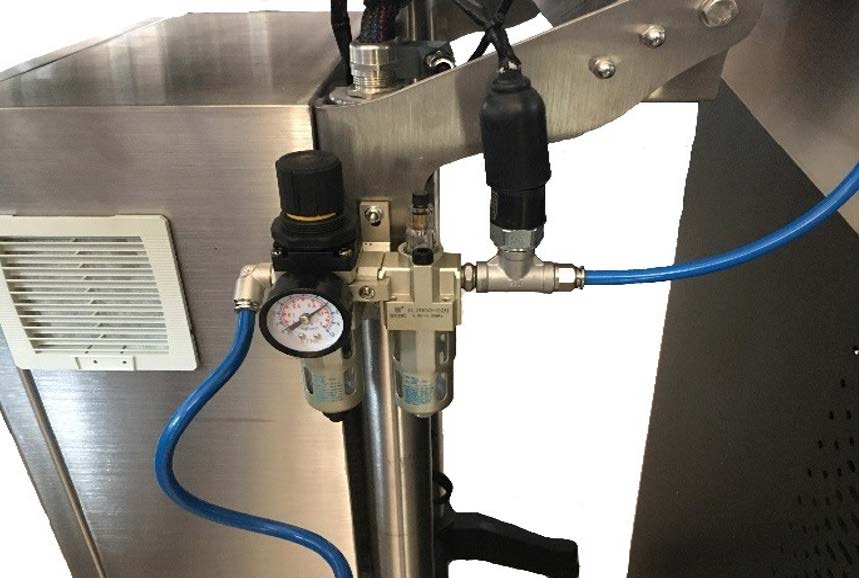
6.4. Connect the pneumatic line:
6.5. Plug in the power cable.
-
Exploitation
7.1. Sel ect the interface language on the touch control display:

7.2. Before starting the conveyor, you need to turn on the heating and wait for the heating element to warm up. Then you need to remove the molds fr om the hopper and send the conveyor to its original position using the «Start position» button.
IMPORTANT: before each start, the conveyor must be returned to its original position.
7.3. After setting the initial position, start the conveyor and vibration using the corresponding buttons.
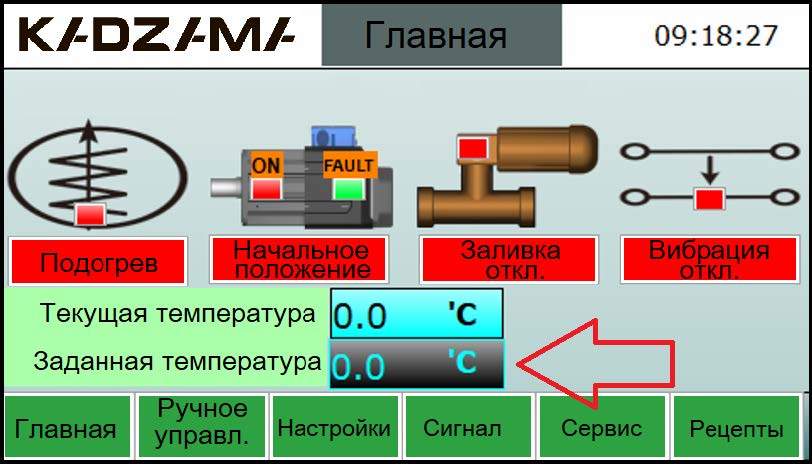
7.4. Set the required temperature:
7.5. To remove the vibrating table, the conveyor must be returned to its original position. The mold hopper must be empty.
7.6. You can control the filling manually (by setting the necessary settings in the manual control menu) or save the necessary settings for different molds in the recipe menu:
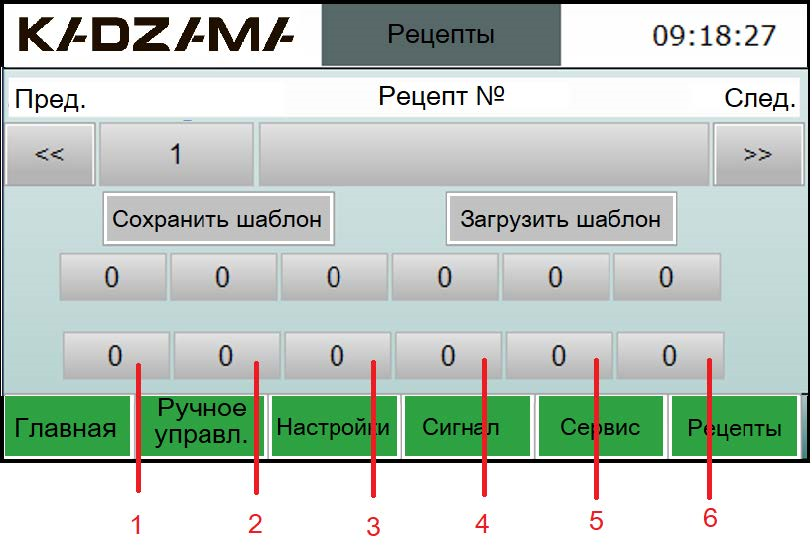
1 — Conveyor speed, [Hz]
2 — Conveyor stop time, [sec]
3 — Filling time, [sec]
4 — Fill delay, [sec]
5 — Mold sensor delay, [sec]
6 — Circuit sensor delay, [sec]
7.7. After entering the required parameters, select a blank recipe number and click «Save template». Use the arrow buttons to switch between recipes.
7.8. To load a previously saved recipe, select its number, and then click the «Load template» button. Send the conveyor to its original position and start the job.
-
Maintenance and care
8.1. During the operation keep the automatic mold loader clean.
8.2. It is allowed to wipe the automatic mold loader with a damp cloth, after disconnecting it from the power supply.
8.3. If the power supply is lost during the operating cycle, restart the machine.
-
Warranty
The warranty period (as well as the terms of warranty service) are specified in the warranty card.
 Sending...